
WoodyThings Notebook DIY
If you’re an artist, or have an artist in your life, they too may enjoy a nice canvass to sketch, paint, doodle, or capture their thoughts on. Do you know anyone in the market for a new, stylish journal or diary? This DIY blog has you covered!
This DIY post will show you how to make a Wooden Sketchpad that can be used for sketching, drawing, painting, writing, and so much more. This pad will measure 1″ tall, 5-1/2″ wide and 8-1/2″ long. If you want to make a different size, just swap the width and length for your preferred measurements.
Okay, lets get down to business. First, let’s go over the material list
- Oak board measuring 1/2” x 5-1/2 x 8.5” (or find 1/4” x 5-1/2 x 8.5). You can find this at your local lumberyard, or frankly, many big-box home improvement stores.
- Sketch paper (approximately 25 sheets or more. Purchase a good quality notebook and you will cut/trim the sheets to size). We found ours at Michaels, but you can find Sketch paper at Walmart, Staples, Joann Fabrics, or any similar store.
- Twine (apprx 36”). Same as above.
Now that you have your materials, lets go over the tools needed
- Table Saw (re-saw the wood into two separate pieces)

- Sander and sandpaper. I recommend 120-grit or higher
- Stain of choice
- Brushes to stain
- Drill and 1/2″ drill bit (to make the holes and attach the covers and paper)
- Ruler (to measure the twine)
- Box cutter or scissors (to cut the twine and paper to size)
- Hole puncher (to make holes on the paper)
- Black electrical tape (to tape the twine ends)
Now that we got the administrative stuff out of the way, lets get to it!
Step 1, Make the Book Covers
a. Drill 4 holes on the left side of the oak board. This is where
y ou’regoing to tie the notebook and create the ’spine’. I suggest spacing the holes approximately 1-3/4″ apart.
b. Re-saw (cut in half) the oak into two 1/4” pieces. Please follow safe equipment handling and operating procedures and use protective eye where and hearing protection.

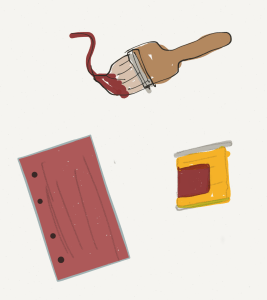
c. Sand and stain the book covers.
Step 2, Cut the sheets
Step 3, Prepare the Twine

Step 4, Assemble the Notebook
a. Align the sketch paper, sandwiched between both pieces of wood (ensure the stain dried!)
b. Feed the twine through the holes.

c. Tie a knot at the spline, but make sure you allow for 1/2” slack, allowing the notebook to be easily opened and pages flipped. The more paper you use, the longer the twine will need to be cut.
d. Once the knot is tied tight, wrap tape around the other string end and cut off the excess.
That’s it, get some pencils, markers or pens and get artsy!
*Additional Finishing Options:
 Before step 4, you may choose to add a creative design to your notebook cover. You can stencil your name
to the front, or wood burn it along with a special quote.
You can then apply a thin clear-coat of polyurethane finish on the wood and allow it to dry.
Your notebook should look something like this:
 If you’re interested in this WoodyThings Notebook, but would prefer we build this for you, click here to pick up your own set.
More of a do-it-yourself? check out our WoodyThings Notebook DIY Kit by clicking here . With this kit you receive two unfinished covers (front and back), four strips of twine, and 25 sheets of sketch paper or graphing paper. This makes a perfect gift for those that want to finish their own WoodyThings Notebook.